Replacing the Splitter Box and Cables
We have gone through 2 splitter box/cables on our D’s Locks in less than 2 years. It happens because of people who do not understand the operation of pull-to-lock levers and force the lever. What happens is that the plastic nipple becomes loose on the splitter box on the input cable and then the nipple slips into the splitter box. The situations happens with new care people and also people like taxi drivers or others who refuse to listen.
I’ve talked to D’s Locks about it and they understood our issue, and said it is something that sometimes happens in situations like ours where others handle the equipment too roughly, like on public transportation, but it definitely does not appear to be the norm. We are having another set of cables shipped out.
You will know if it happens if the pistons will no longer disengage and the input cable nipple slips into the splitter box. You should be able to feel it by gently tugging on it to see if it is loose. Once that happens, there is no way to fix without getting a new splitter box and cables from D’s Locks.
-

- Splitter box with good nipple

-

- Splitter box with faulty nipple

-

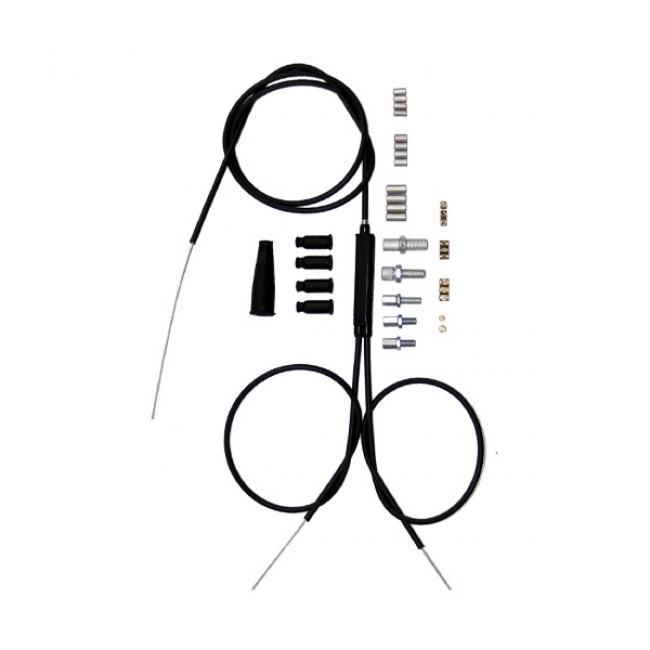
- Cables (long)

-

- Lever assembly

-

- Pistons

-

- Piston assembly

Replacing the cable on the Lever
- Loosen the allen head (hex) screw on the lever clamp using a 3/16” Allen (hex) wrench
- Remove the lever from the lever clamp.
- Loosen the lever tension via the nut on the bottom of the lever using a 7/16″ open end wrench.
- Remove the cable from the lever.
- Replace the cable on the lever.
- Reassemble the lever clamp.
Note: For more information, see the installation instructions for operating lever in the Owner’s Manual.
Replacing the cables on the Pistons
- Loosen the piston jam nut on the piston adaptor.
- Unthread the piston from the piston adaptor
- Unscrew the Piston End Cap, Spring, Piston, and Sleeve
- Replace the cables
- Reassemble the piston assembly
Note: It is best to first replace one cable and then the other so that you have it for reference. For more information, see the installation instructions for your type of wheelchair.
Splitter Box and Cable specs
I was looking for a solution to solve the problem we are having with the splitter box and cables. Unfortunately, all of the options I looked into (see below), it does not seem that any of them will work after talking with D’s Locks.
D’s Locks has the splitter box/cables manufactured to spec so it meets ISO 9000 standards for FDA approval. It’s not the same as the Venhill mentioned below, but is similar (something about Westcon in Kansas City was mentioned).
I took the splitter box apart. The following are some photo’s and my understanding about the parts. I may not be using the correct terms and the measurements may be slightly off because my caliper only measures to the millimeter.


Splitter box and slider
- Splitter box: 23 mm width, 75 mm depth, 12 mm height, with 3 sliding rails of 65 mm on each side. It has some type of lubricant inside.
- Slider: 19 mm width, 11 mm depth, 13 mm height
Single cable from lever to splitter box
- Cable material: It appears to be galvanized steel.
- Cable length: approximately 23.5 cm including cable ends.
- Cable diameter: It appears to be 2 mm diameter, similar to motorcycle throttle cable (mountain bike brake cable is usually about 1.5/1.6 mm in diameter).
- Cable housing: 6 mm helical — helix of steel wire with protective covering.
- Cable end / anchor at lever: The side that goes into the lever is barrel-shaped similar to the type used on mountain bike brake cables. It is 8 mm wide with a diameter of 7 mm. The cable is soldered into the cable end.
- Cable ferrule at lever: 22 mm long with a diameter of 7 mm.
- Cable nipple at splitter: The side that goes into the splitter looks is cylindrical nipple, similar to the type used on mountain shift cables. It is 5.5 mm wide with a diameter of 7 mm. The cable is soldered into the cable end.
- Cable sleeve at splitter: Nylon sleeve with a diameter of 7 mm.
Double cables from splitter box to pistons
- Cable material: It appears to be galvanized steel.
- Cable length: approximately 41 cm including cable ends.
- Cable diameter: It appears to be 1.1/1.2 mm in diameter, similar to a bicycle shift/derailleur cable.
- Cable housing: 6 mm helical — helix of steel wire with protective covering.
- Cable nipple at splitter: The side that goes into the splitter looks is cylindrical nipple, similar to the type used on mountain shift cables. It is 5.5 mm wide with a diameter of 7 mm. The cable is soldered into the cable end.
- Cable sleeve at splitter: Nylon sleeve with a diameter of 7 mm.
- Cable end / anchor at piston: The side that goes into the piston is ball-shaped with a diameter of 4 mm. The cable is soldered into the cable end.
- Cable ferrule at piston: 12 mm long with a diameter of 6 mm.
Other Options for the Splitter Box and Cables
Problem Solvers Cable Doublers
This looks to be quite robust and well designed. It’s quite expensive, so I would want to know if it had any chance of working before ordering it. http://problemsolversbike.com MSRP: $62.50 BR3341 Cable Doubler 1:2 Pulls two brakes with one lever. Can be found on Amazon in Europe. See this link for the Cable Doubler 1:2 Instructions.
After talking with D’s Locks, the problem would be in the “knarps” (cable ends) pulling through, and the springs would need to be taken out. From what I have gathered, a knarp is mostly used on BMX brake cables. The knarp is a bolt-on cable end that replaces a ferrule/crimp on standard bicycle brake cables and is mostly used on double-ended brake cables or upright-handlebar brake levers, for example, BMX knarps like those used on Odyssey Gyro brake detanglers.
“We make two Cable Doublers. The first allows you to control two brakes with just one lever. The second allows you to control one brake with two levers. Why? Well, there are myriad applications: cyclocross, fixies, tandems, bike polo, tricycles, recumbents, cycles for those with special needs, those four-person bikes you see on beach boulevards, and so on. You could even link them both together for ultimate redundancy!”


Paul Component Duplex Lever
This is an interesting concept too. They seem to be very nicely designed and engineered. Of course, the biggest issues would be to get them to mount on a 1.25″ wheelchair frame in a position that they were usable and not in the way of transfers. http://www.paulcomp.com MSRP: $69.00 Item #: 095BLACK
After talking with D’s Locks, along with my very obvious points, I missed the even more obvious, which is how to keep it open in an unlocked position.
“The Duplex Lever is a single brake lever that pulls on two brake cables simultaneously. It was originally designed for bike polo players, to allow them to use both brakes while swinging a polo mallet with their free hand. Since its introduction the Duplex has generated considerable excitement among adaptive cyclists as well. The Duplex Lever uses inline barrel adjusters that can be installed at any point along the brake cable housing.”


Venhill Universal Split Dual Throttle Motorcycle Cable Kit with Junction
 I do not know for sure, but I think the D’s Locks use a cable kit something like this to actuate the 2 cables going to the pistons. After looking at the specs, it looks like motorcycle throttle cable is about the same size, 5mm OD as bicycle brake cable, but much longer than needed for D’s Locks. http://www.venhill.co.uk and http://www.venhillusa.com. MSRP: $45. Can be found on Amazon UK and US and also on their website.
“One cable splitting into two. Cable kit supplied to be finished off as required. A variety of fittings are supplied to suit most applications. The standard conduit has a black PVC outer cover. For more information including technical details of components, and Junction box assembly Click Here.”
Replacing the Lever nut and bolt
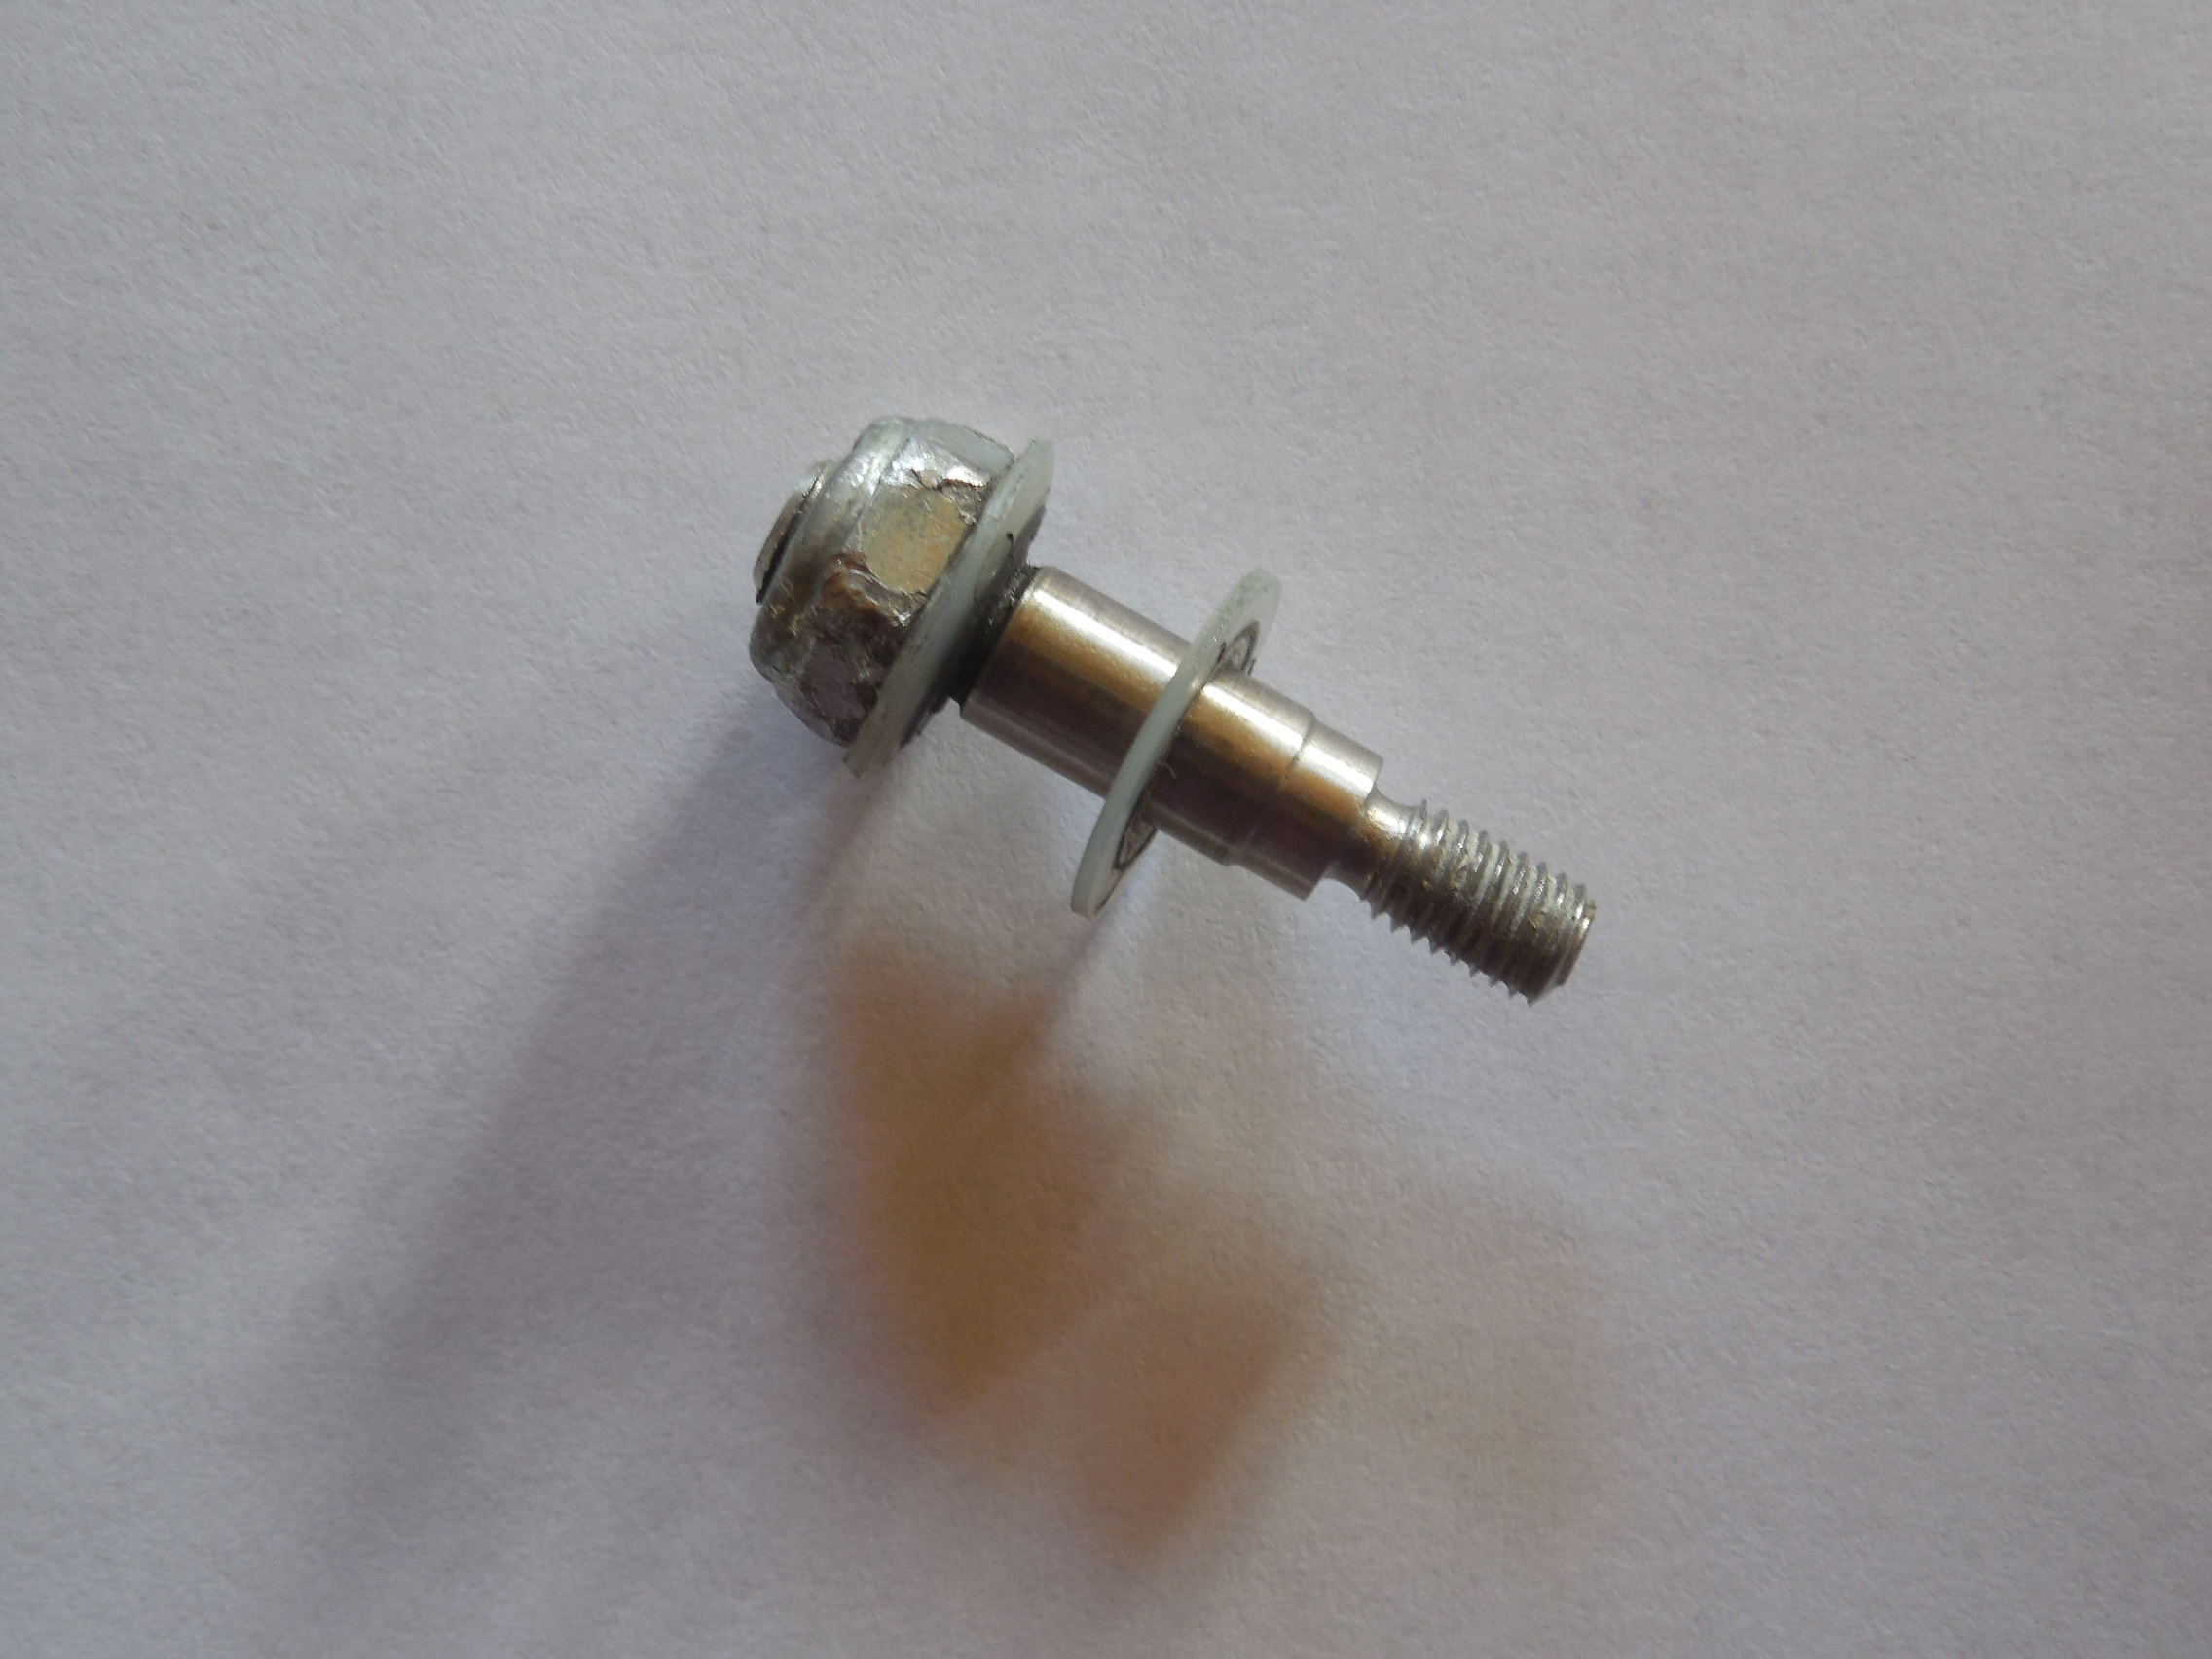 We have also had issues with the the lever nut and bolt becoming loose. After about 2 years it needs tightening every few days, and if someone handles it roughly, it becomes very loose and the pistons will no longer disengage. Again, this seems to happen because of people who do not understand the operation of pull-to-lock levers and force the lever, and will not listen.
I took it apart to have a look at it, but could not really tell if it is a double ended stainless stud/bolt with an alloy lock nut or possibly some type of shoulder/stripper bolt. Because an adjustable wrench is often used, the head is getting very worn down from constantly tightening the tension. Ideally, I would prefer a hex head so that only a hex wrench would be needed to tighten it.
D’s Locks produces the lever nut and bolt assembly themselves. The lock nut is bonded to the bolt and the bolt is bonded into the lever assembly. It appears that our bolt became unbonded within the lever assembly. I had thought that maybe we could just replace the lock nut on the top, but that bond appears to be good. I asked if something like Loctite thread locker red or green might work on the threads of the bolt, but was told that they are not strong enough to hold it. It was mentioned that as a temporary fix we could try to crimp the narrow end above the threads and use J-B Weld, a steel reinforced epoxy. We decided it was better to wait and replace the entire lever assembly, as the chair it is used on is only used part-time.